About ten years ago, we bought a bronze chandelier to hang over our dining room
table. . . I was really into bronze at the time, which was before I realized
I had a passion for all things vintage. . .
This is what it originally looked like. . .It was a pretty nice piece still, and
I didn't MIND the bronze, but I had moved on from the rustic look.
This is actually the chandelier that stole my heart. . .however it was a whopping $500,
and I knew I could do something similar with what I already had.

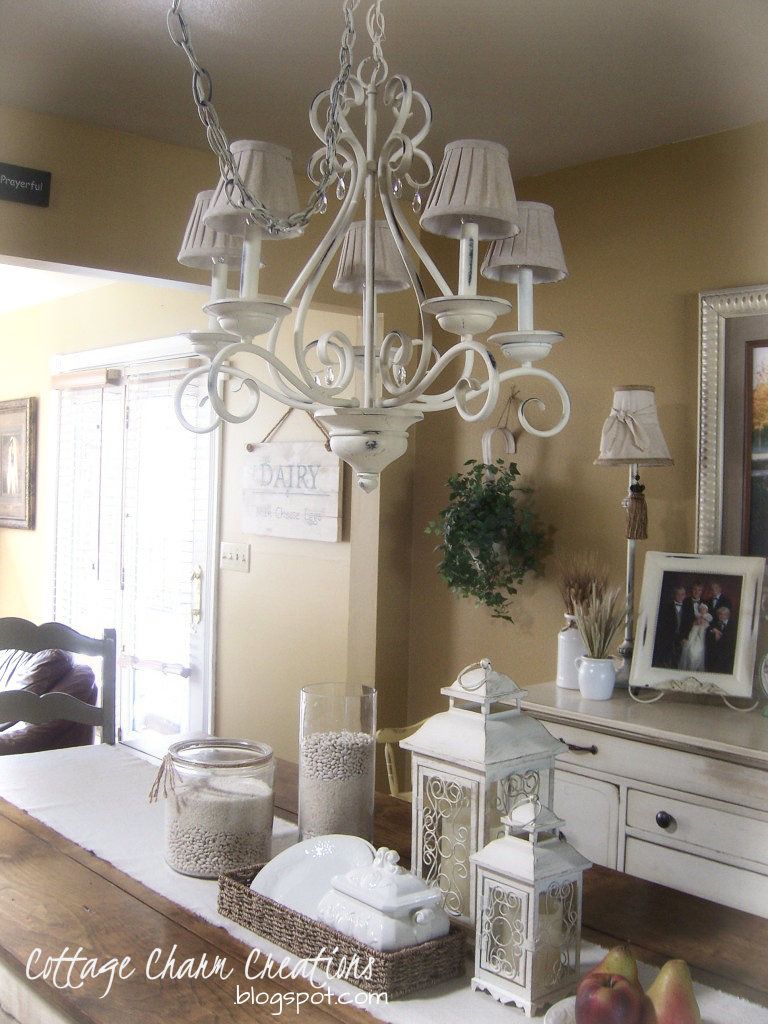
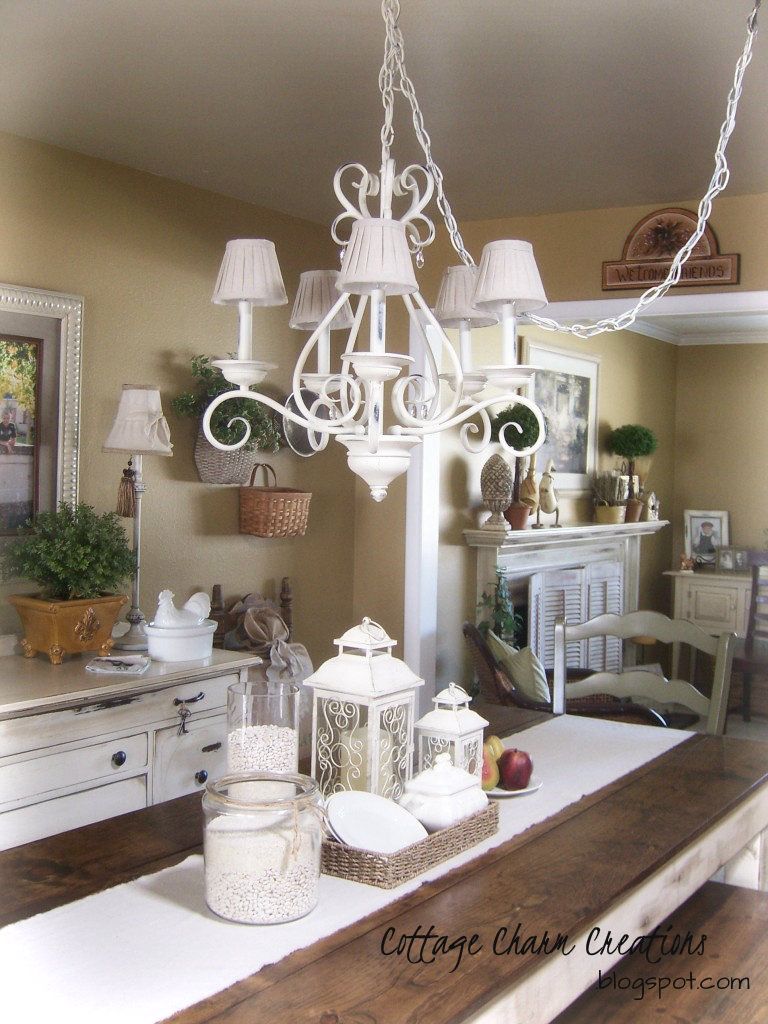
I decided to go with a lighter finish. . .one that would compliment the
tones throughout the room.
After thoroughly dusting my piece with my brush, I placed it upside-down,
and sprayed a light coat of Rust-o-leum Heirloom White.

I then sprayed a second coat about an hour later, making sure to spray
the cord and chain as well. . .

After completely dry, I turned it over and did the same process.

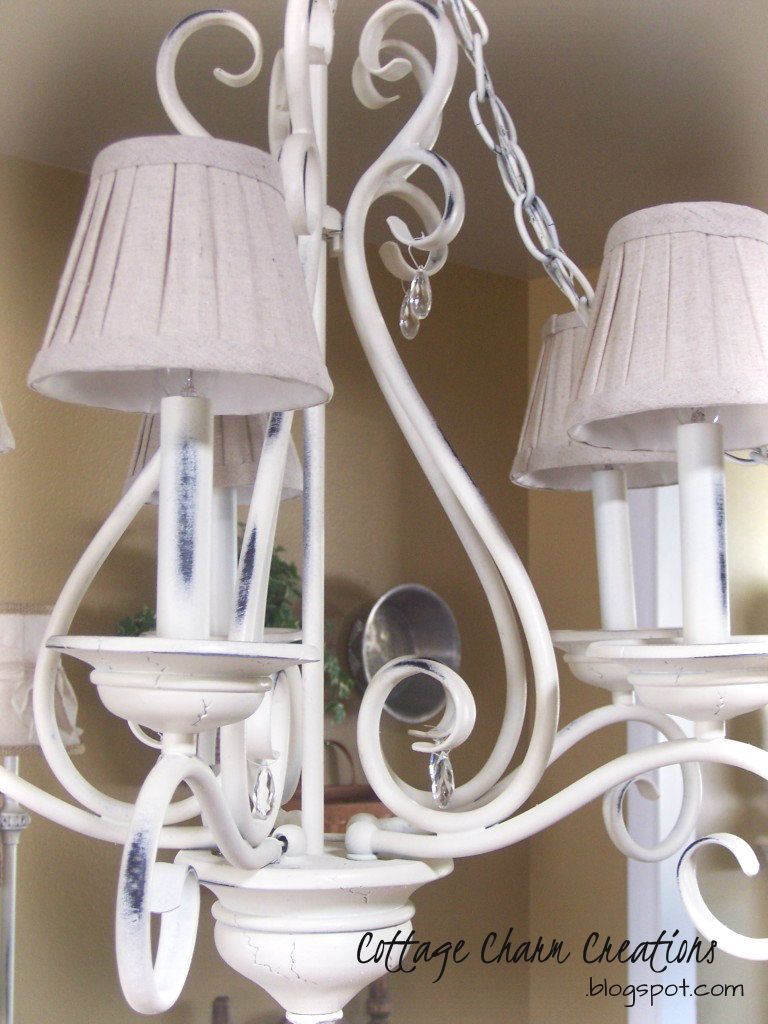
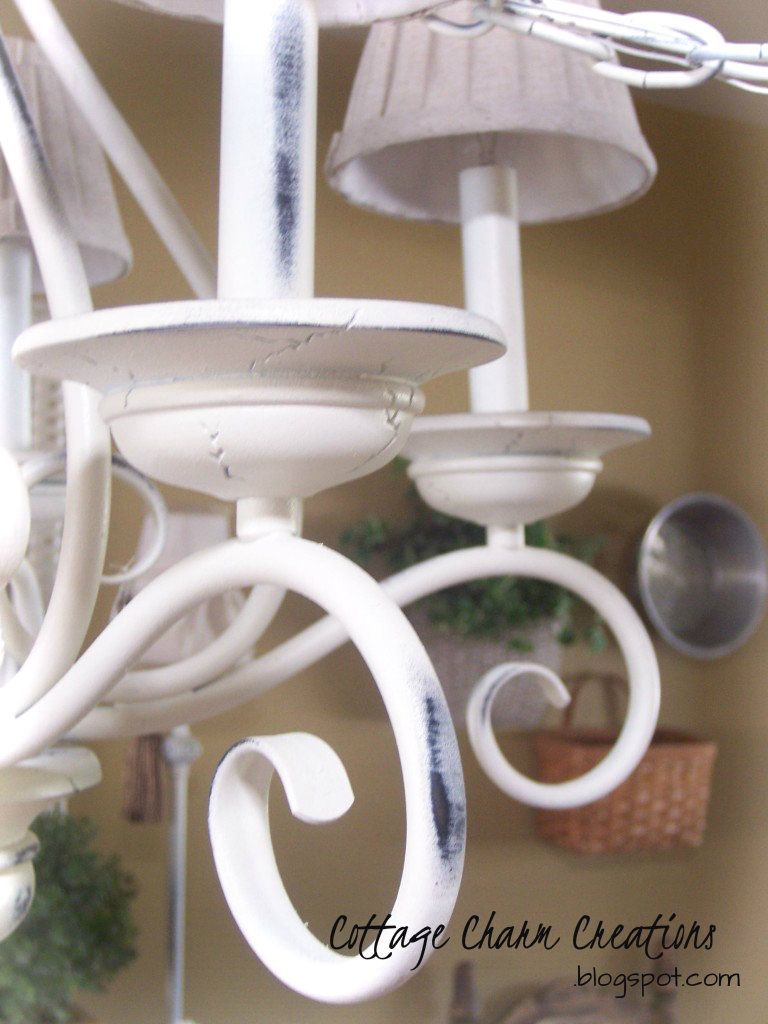
Now for the fun part. . .distressing!!
Using a medium grit sanding sponge, I sanded away along areas that
would "naturally" wear and rub over time, exposing the dark bronze from
underneath, which made for a great contrast.

The main expense was in the mini linen shades, and glass beads,
which I got from Hobby Lobby. The nice thing about Hobby Lobby is if you
find what you want, and are patient, then they will always rotate their 50% off
sales. This is the time to snatch up what you've had your eyes on. . .
in my case it was these beautiful linen shades. . .


After hanging my lighting, I determined where to place a little bling. . .
Ahh yes. . .a little here, a little there. . .just enough to add a bit of sweetness :)
Not too bad for a grand total of $21, and I LOVE the way it pulls the room together. . .