Saturday, February 2, 2013

construction zone part 1

You'll notice that my posts have been few and far between
lately. Besides the fact that we've been super busy (yay for work!!)
 my camera finally died and needed a proper burial. . .I know, its sad.
 
These pics are taken with my iPhone, which will have to do
until I get my paws on a new camera. Anyways, here's a little peek into
the project we're working on in our home. . .yes, you heard me right!
 
Instead of working on a clients home, we're actually working on our own. . .yay me!
 
 
This is the pile of tile my sweet son has been tearing out. . .you may need to
throw on a hard hat, because there's chunks a flyin' around here :)
 
As you walk in, this is the first room that you see. . .it's usually not such
a pig pen, but when there's demo going on, who feels like cleaning?
 
This room is getting a fresh coat of paint as well as hardwood flooring. . .can't wait!


This is standing in the same spot, but just looking forward into the kitchen.
You can see where we've ripped out all of the tile. . .the carpet's going next!


Here's another angle of the kitchen over by the dining table.
While we've loved the country finish we did on the kitchen a while back,
we've decided it was time for a new face lift as well.
 
Ugh. . .I promise to get better pictures next time too :(


The kitchen, dining room, and family room are all connected.
Basically, the whole main floor is getting hardwood flooring, and fresh paint.
Bye-bye to mustard walls and Berber carpet!


We have three sets of stairs that will get the hardwood treatment as well.
I'm hoping to switch out some of the dated lighting too. We'll see if hubby cooperates.


Here's a little peek of what we're doing.
I originally wanted dark walnut floors (for as long as I can remember)
but when I saw this sample of hand scraped Aspen, I fell in love!
The wall color we choose is called Khaki Shade, by Sherwin Williams,
and this beautiful Belgium rug from Home Goods will go very nicely in the family room.
 
 
We're definitely in the messy-not-so-fun stage, but I know it will
all be worth it when it's done!

Tuesday, January 8, 2013

New to the farmhouse collection

Since we 've had so much fun with building our farmhouse tables, we decided to
try a few other pieces that's been waiting around in the sketch book. . .
 
Say hello to our Chunky Style Coffee tables :)


We wanted it to be super simple in design, and reflect a worn, timeless appeal. . .


Next in the sketch book is a shutter style headboard and platform bed, which
will soon be available on our new Farmhouse Collection website here. :)


Wednesday, December 19, 2012

cheap quick fix

Here's just a cheap quick fix that most of you are probably aware of,
but I thought I'd mention it here just in case :)
 
Lighting can be costly to replace, but can be refinished for under $10.
 
Here's a brass light fixture that looked like it was ready to be replaced. . .
 

It actually had a nice design to it, and so we decided to run to our local
Home Depot to pick up a can of Bronze Metallic Finish Spray.


All it took was a little dusting off with a dry paint brush,
and then three light coats of the spray paint (allowing each coat to dry thoroughly)
and it was done. . . I just LOVE quick fixes!

 
This aerosol spray can go right over metal, plastic, ceramic. . .pretty much anything.

BEFORE. . .

 
. . .and AFTER :)


Wednesday, November 21, 2012

two tone kitchen re-do

 
Here's a kitchen we just recently finished. The granite counter tops and
beautiful tile back splash were new, which made this kitchen look amazing
just as it was. The cabinets were in pretty good condition, but had a little
water damage, and the blonde finish was a little dated.
 
 
Our client decided to go with a two-toned finish. . .
The main body is finished in antique white with walnut glazing.
We installed a beadboard wrap and baseboard around the bar,
which is finished in Espresso with black glaze.


Bead board was also added to all the sides. . .
 
 
On the opposite wall, theres this little desk area. . .

 
 Which was finished in the Espresso as well :)
 
 
Needless to say, we were delighted with the results!


Saturday, November 17, 2012

stunning vintage sideboard

This amazing sideboard belonged to a client who happened to
pick it up at a yard sale for a VERY, VERY good deal.
Even in this condition I could tell what amazing potential it had.


The tones throughout my clients home was soft and soothing greys. . .so
naturally, she decided to go with a grey that would compliment her surroundings.
 

Since her decor is more on the modern side, we went with a minimal amount
of distressing. . .just enough to accentuate the amazing designs and turned legs.
 
Oh my. . .those are beau-ti-ful legs!!


The hardware was switched out for a chunkier, more updated style which also
added a lot of personality and charm :)


As far as a finish coat, we went with a semi-gloss to give the luster a warm glow. . .
 
Simple, yet stunning.


Color: Gauntlet Grey by Sherwin Williams
Hardware: Hobby Lobby
 
Now off to our next project!!
 

Thursday, October 18, 2012

sweet little vintage hutch

 Once in a while I come across something that
pulls at my heartstrings. . .this was one of those pieces.
 
The curves, the lines, the turned legs, and overall design. . .very charming :)


One of my cute clients called me wondering if I'd like this. . .
ummm. . .heck yeah! 
It only took a second for me to know exactly where she was gonna go. . .


Since I knew that this was going to be a keeper for a very long time, I decided
to give her a timeless but classic finish with antique white, and a little
minor distressing to show a hint of wear and tear.


She fits nice and snug between the kids' rooms at the top of the landing. . .


The inside was kept in its original form for a nice contrast
against the white. . .not to mention I love the warmth the wood provides.
 
Pieces like this remind me of a more simple, slow paced life. . .
and who doesn't need to be reminded of that every once in a while? :)


Thursday, October 11, 2012

New items!

We have been so crazy busy with custom jobs and farmhouse tables, that we've not had much time to finish any of our items in stock. . .but we managed to squeeze in a few this week :)
 
 
First is a large 9 drawer dresser/media cabinet. Very solid and heavy, and all the drawers
are in good functioning condition. Finished and distressed in antique white.
Measures 70"w x 18"d x 32"h.
 
Now available for $250 (SOLD)


Dove tail drawer details. . . 


Distressing details. . . 


Next, we have a walnut glazed bookshelf with adjustable shelves, solid and sturdy.
Measures 28"w x 12"d x 72"h.
 
Now available for $125 (SOLD)


Call or text if you'd like to come see in person!
801-209-1551 :)


Wednesday, October 3, 2012

French Country Entry Door

I am usually a pretty conservative person, however every once in a while we're allowed to do something a little extravagant right?? My front door was needing a new paint job and frankly,
I was getting a little bored of the brown. . .this door needed a little pop :)
 
 
Here's how it originally looked, and I really liked it. . .but when things
begin to seem a little dull in my life, I pull out the paint and get to work.


Last week, while strolling through Gardner Village, I spied this
ADORABLE
aqua door that looked very much like mine. . .and I was smitten.
Paint rarely scares me but something about painting my front door this color
made me REALLY nervous!
 
Oh, but it's such a cute door!

 
After holding up a few samples, I decided that blue would compliment
the colors on my house. . .so, I went for it. . .GULP!
 
Here's the color I came up with. . .it's a combination of two colors I had
in my garage and it turned out just the way I wanted.
I love it when that happens :)

 
This door had alot of detail that I decided to do a French Country
Overcoating technique on, which gave it a worn & timeless appeal. . .


Next, it recieved an oil glaze rub down to polish off that
old world style I was going for. . .something that looks like it was pulled
right out of a vintage cottage in the french countryside. . .
 
Ahhh, YES!


Now this door is one that says
WELCOME HOME :)


To view info on our Overcoating tutorial, see here. 
 
 Under coating custom tutorial

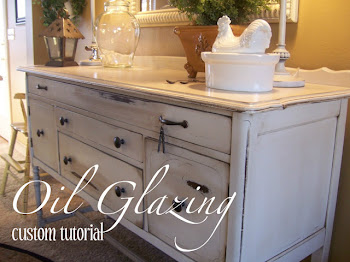
To view info on our Oil Glazing tutorial, see here.
 
Oil Glazing Tutorial